
Reviewed · ZAGREB
Zagreb Photo Safari
Great photos start with smart pacing. Zagreb Photo Safari is built around getting you to the right spots at the right moment, while the guide also shares Zagreb culture so your shots feel connected—not random. I like that it works for both first-timers and advanced shooters, and I like the emphasis on optimal light timing instead of a slow, take-everything-in tour.
Two things I really like: the teaching is practical and device-aware, and it’s designed so you can leave with better photos even if you only have your phone. In guest feedback, guide Darko Jeličić is praised for helping people think about composition (including with an iPhone 14) and for pairing that with stories about what you’re actually seeing.
One possible drawback: with so many stops, the pace can feel tight. Expect short visits—many are around 10 minutes—so if you prefer long, quiet shooting sessions, you may want to go easy on expectations and focus on capturing one strong shot per stop.
In This Review
- Key highlights that make this photo safari work
- Price and how the $117 adds up in real time
- Where it starts and what the tour format feels like
- The photo-game plan: parks, squares, and medieval streets—on purpose
- Trg kralja Tomislava to Zrinjevac: composition practice in green center-city parks
- Art Pavilion and the Meteorological Post: architecture details and texture shots
- Ban Jelačić Square and Zagreb Cathedral: center-city icons for strong silhouettes and spires
- Dolac Market and Opatovina Park: food textures, movement, and wall art
- Tkalčićeva Street and Mlinarske stube: street story framing and leading lines
- St. Mark’s Church and Petrini Pyli (Stone Gate): medieval framing with surviving details
- Lotrščak Tower and Zagreb Funicular: skyline practice with a daily noon cue
- Ilica, Flower Square, and the Croatian National Theatre: long lines and dignified facades
- What the guide teaches you: composition, device settings, and progressive skill-building
- Who should book Zagreb Photo Safari (and who might want a different pace)
- Should you book this Zagreb Photo Safari? My practical take
- FAQ
- How long is the Zagreb Photo Safari?
- What is the price of the tour?
- Is the ticket digital?
- What does the tour include?
- What is not included?
- Where do I meet the guide?
- Is this a private tour?
- What kind of photographers is this for?
- Can I cancel for free?
Key highlights that make this photo safari work
- Timed light across a string of photo stops, so your photos aren’t limited to whatever time you happen to arrive.
- Hands-on guidance for beginners through experienced photographers, with different approaches depending on your level.
- Phone-friendly instruction, with examples of people shooting on an iPhone 14 and getting composition help on the spot.
- A covered ticket component for the Kula Lotrščak viewpoint, which matters for getting a usable panoramic session.
- A private format where it’s just your group, so the guide can steer you without generic, one-size-fits-all explanations.
- Culture plus crazy photo stories, so you’re learning why a place matters and how photographers tackle real challenges.
Price and how the $117 adds up in real time
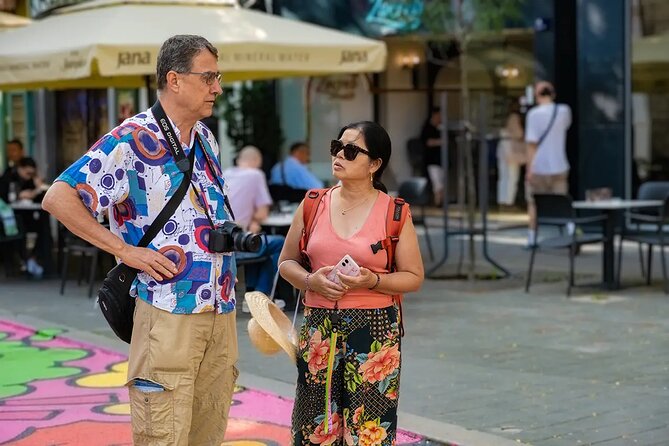
Zagreb Photo Safari costs $117 and runs about 2 to 4 hours. On paper, that can sound like a “guided walk” price. In practice, what you’re buying is more like a mini course delivered at location—short stops, quick feedback, and the guide deciding where you should stand for the best results.
Also, many of the itinerary stops list free admission, which helps keep the cost from creeping upward once you arrive. The tour is structured to make that time count: you don’t just “see” Zagreb; you’re given a reason to look carefully and a method for turning a viewpoint into a photo.
If you’re the kind of traveler who spends time hunting for the perfect angle while others are still chatting, this kind of timed, guided pacing tends to feel like good value. If you hate being rushed, you’ll want to keep your expectations focused on “capture and move” rather than “linger forever.”
More time in Zagreb than you have plans? Here are other tours we rate.

Where it starts and what the tour format feels like
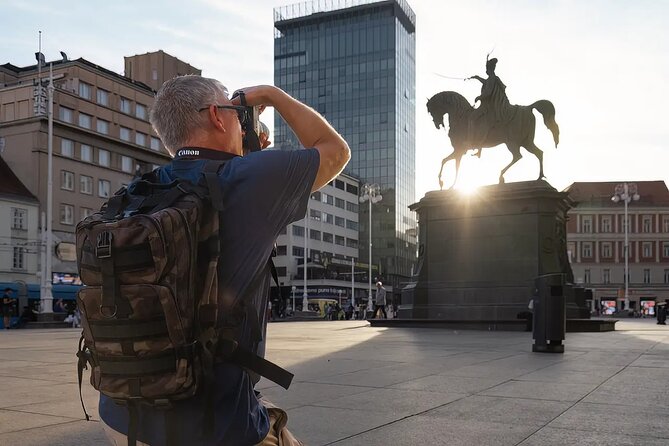
The meeting point is Trg Kralja Tomislava 12, Zagreb, and the tour ends back there. That matters because you’re not figuring out transit mid-photo mission—you’re just following the guide’s rhythm.
It’s also a private tour/activity: only your group participates. That’s a quiet advantage for photography teaching. Your guide can react to your camera settings, your framing habits, and your ability to move quickly when the light changes.
You’ll also have a mobile ticket, which usually means fewer steps at check-in. One more practical detail: there’s a beverage break built in. That’s not a throwaway perk. When you’re shooting for hours, a quick pause helps you reset your eyes and your posture so you’re not just grinding through the next stop.
The photo-game plan: parks, squares, and medieval streets—on purpose
This safari is designed to make you think like a resident of Zagreb, not a tourist. That resident mindset shows up in the route: the tour moves through the city’s “everyday” public spaces—parks, markets, squares, stairways—then into medieval landmarks that anchor the old town.
Beginners get time to work on composition and camera usage. Experienced photographers get encouraged to “race around” for multiple locations, with the schedule built around optimal light at each place. Either way, the shared goal is the same: fewer random clicks, more intentional frames.
The guide also gives recommendations on scenic viewpoints before you start, so you can show up ready to shoot instead of scrambling after the best moment has passed.
Trg kralja Tomislava to Zrinjevac: composition practice in green center-city parks
Your first run of stops is centered on the city’s green, central spaces, starting at the King Tomislav Statue in the park near the square. This spot is described as picturesque day and night, and that’s key for a photography safari. You’re not limited to one look; you can build different moods from the same base location depending on timing.
From there, you move to the Art Pavilion (Umjetnički Paviljon), noted as the oldest gallery in South-Eastern Europe. What makes this useful for photos isn’t only the building—it’s the sculptural details (busts of Croatian and foreign artists) and the fountain behind the pavilion. For beginners, statues and fountains are great for learning framing discipline: you can practice symmetry, leading lines, and clean backgrounds. For experienced shooters, it’s texture-and-detail territory.
Next comes Zrinjevac, a park you can walk through or sit in. This stop is useful for a different reason: parks let you work at multiple distances. You can shoot wider scenes with old buildings in the background, then move into tighter frames for people, paths, and small foreground elements. It’s a controlled environment for testing whether your composition holds up.
Practical note: most of these stops are around 10 minutes, so your best strategy is to pick one theme per stop—wide composition, mid-shot, or detail—and commit.
Art Pavilion and the Meteorological Post: architecture details and texture shots
After the Art Pavilion, you head to the Meteorological Post at Zrinjevac, built in 1884. A meteorological station might sound niche, but it’s exactly the kind of object that helps you practice photography beyond big monuments. These small, historical structures give you strong shapes and a chance to build a frame around materials and age.
If you like architectural photos, this is the kind of stop where you can learn to spot photo opportunities without needing a dramatic skyline. It also gives you a break from constant moving, which is valuable when you’re trying to control focus and exposure.
The stop is listed as about 10 minutes, so again, treat it like a quick assignment: one or two compositions, then move on.
Ban Jelačić Square and Zagreb Cathedral: center-city icons for strong silhouettes and spires
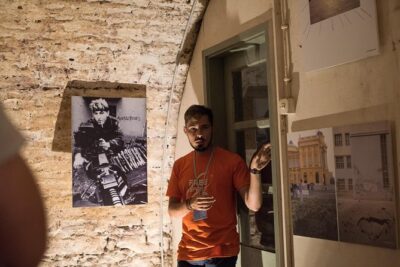
Then you hit the heart: Ban Josip Jelačić Square, the most popular meeting place in Zagreb. The statue of the 19th-century governor dominates the square, which is a gift for photographers. A statue in an open square is made for bold subject placement and simple background separation.
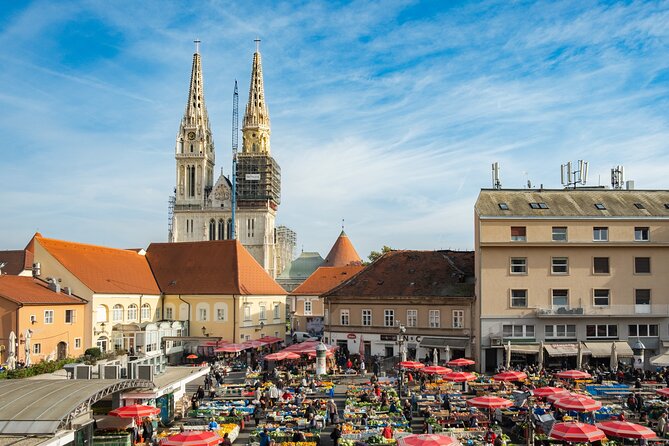
Right after that is Zagreb Cathedral, built from an original Gothic structure but transformed over time and reconstructed after an earthquake in 1880. The cathedral’s twin spires are a major visual cue from multiple directions, which is helpful because you’re not locked into one viewpoint. Even from the outside, the structure is described as very picturesque.
For photo value, this stop helps you practice how to shoot tall buildings without letting them become a messy vertical smear. You’ll want to think about your distance and how you anchor the spires in the frame. If you’re shooting on a phone, this is also where you learn how to stabilize your shot and keep lines from leaning.
The cathedral stop includes external scenery and interior context (like the frescoes mentioned in the sacristy), but your active time at the location is still brief—listed at about 10 minutes.
Dolac Market and Opatovina Park: food textures, movement, and wall art
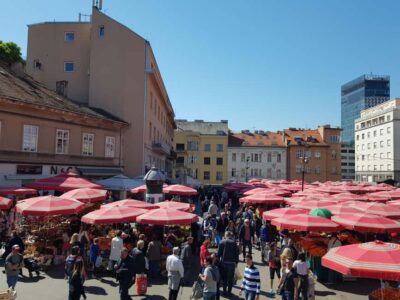
At Dolac Market, you step into one of Zagreb’s best-known farmers’ markets. It’s described as having both a traditional open market with stalls and a sheltered market below. It also has a long-running role in local trade, and it sits close to Ban Jelačić Square.
For photography, markets are a fast school in exposure and contrast. You’ll often face mixed lighting—sunlight, shade, and indoor shadows. That’s where a guide can help you avoid getting stuck. Even if you don’t plan to shoot portraits, you can photograph produce patterns, hands, baskets, and the stairs-and-levels layout that naturally creates layered compositions.
Next is Opatovina Park, where murals by four Croatian artists appear along eastern walls. This is a good “change of pace” stop. After market textures, you get cleaner graphic surfaces. Murals also help with color balance and framing rules for street-art style photography.
Because both stops are about 10 minutes, decide fast what you’re after: one tight detail set at the market, then one or two wall compositions in the park.
Tkalčićeva Street and Mlinarske stube: street story framing and leading lines
Tkalčićeva Street is Zagreb’s hub for cafes, restaurants, and casual nightlife. It’s a long stretch filled with places to eat and shop, which means you can photograph life in different ways—from storefront details to street geometry.
But the tour also pairs this street with specific local backstory: it used to be a stream dividing Gradec and Kaptol, and contamination led to it being diverted. Later, from 1899 to 1941, many houses became brothels, and opaque glass and red lanterns were required in the center. That’s why Zagreb is described as the first city in Europe to have a proper red light district.
You don’t need to linger on the story to use it for photos. Instead, you can use it to guide your composition choices. If you know a street has a history of controlled light (red lanterns), you can be more intentional about reflections, shadows, and how bright points sit in the frame.
Then you move to Mlinarske stube (Mill stairs), which connect Kožarska Street with Radićeva Street. Stairs are a photographer’s friend: they create strong leading lines and give you a natural sense of depth. You also tend to get multiple angles without changing your entire position—use that to test wide-to-tight frames.
St. Mark’s Church and Petrini Pyli (Stone Gate): medieval framing with surviving details
Next: St. Mark’s Church, famous for its colorful patterned tile roof. The structure has been through fire and earthquake damage, but an ornate Gothic portal survives, and devotional sculptures and frescoes are mentioned for the interior. From a photography standpoint, the patterned roof is an immediate subject magnet. You can practice clean background separation and learn how to avoid “busy frame” problems by choosing a simpler foreground element.
After that comes Petrini Pyli, also known as the Stone Gate, described as the eastern gate to the medieval town and Zagreb’s most significant shrine. It’s the only gate still standing from the four main gates of the 13th century. Inside the gate, there’s a shrine and stone slabs praising the Mother of God, and the painting of the Mother of God is said to have survived a 17th-century fire and is protected by an iron fence.
This stop is especially useful if you want photos that feel grounded in history without needing a museum setting. A gate structure is also perfect for “frame within a frame” composition. You can use the archway to define your subject and keep the shot from turning into random architectural clutter.
Lotrščak Tower and Zagreb Funicular: skyline practice with a daily noon cue
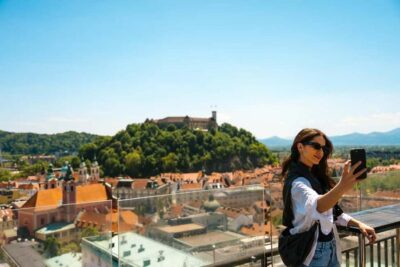
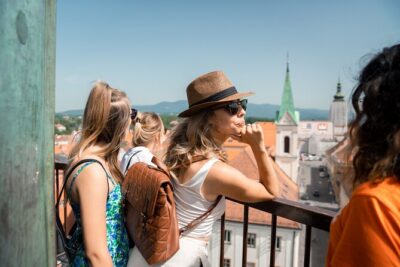
Then the route climbs into iconic viewpoints. Lotrščak Tower is a 13th-century defense tower, and a cannon is shot every day to mark noon. That detail matters because it turns the tower into a time-based photo moment rather than just a static landmark.
You’re also getting a covered ticket for the Kula Lotrščak viewpoint, which is where the tour’s structure shows its practical side. A viewpoint can be great, but weather and glare can ruin it. A covered ticket suggests the tour wants you to have a more controllable, usable way to capture the panoramic angle from inside a protected space.
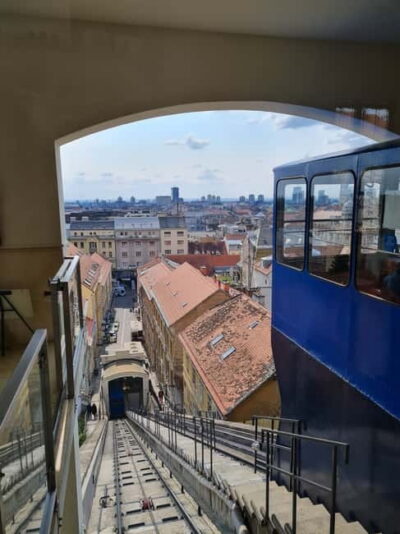
Right after, you use the Zagreb Funicular, described as the shortest funicular in the world and the oldest/first means of public transportation in Zagreb, spanning just 66 meters. For your photos, funiculars create motion and perspective. Even if you don’t get a “wow action shot,” you can use the structure and urban slope for stronger angles.
Ilica, Flower Square, and the Croatian National Theatre: long lines and dignified facades
The safari continues with Ilica, one of the longest and oldest streets in Zagreb. It stretches from Ban Jelačić Square eastward across the city center and has more than 500 addresses. It’s also a main shopping street, so you get a mix of storefronts, street rhythm, and pedestrian flow.
For photography, long streets are great for learning pacing. You can shoot forward-looking compositions to practice perspective and spacing, or you can slow down for tighter storefront frames. The guide’s light-timing approach can also help you avoid the harshest contrast if your route is right.
Then you reach Petar Preradović Square, commonly known as Flower Square due to flower kiosks. It’s about 200 meters from Ban Jelačić Square. This is a strong place to work on color and subject isolation. Kiosks give you a consistent foreground element, which helps your photos look intentional rather than accidental.
Finally, there’s Teatro Nacional de Croacia (Croatian National Theatre). It stages drama, opera, and ballet, with frequent performances and premieres mentioned. Even if you never enter a theatre setting, the building’s presence is useful for clean architectural shots—symmetry, scale, and formal lines.
What the guide teaches you: composition, device settings, and progressive skill-building
This is the heart of the tour. The concept is simple: beginners should have time to work on composition and camera usage, while experienced photographers can move fast and hit many spots with good timing.
The “phone photography upgrade” and the fact that the guide is a professional photographer-guide are the clearest signals that this isn’t only for people with dedicated cameras. In guest feedback, Darko Jeličić is praised for teaching new ideas even when using an iPhone 14, which is exactly what I’d want from a city photo safari. You should be able to get better without buying new gear.
The tour also mentions tracking your evolving photography skills and techniques in a progressive manner. Translation: the guide isn’t just naming landmarks. The guide should be helping you build habits stop to stop—shoot one way at the statue, then apply the idea to the cathedral, then test it on street lines in the old town.
This matters in a short tour like this. Without a progression plan, you leave with lots of pictures and no clear improvement. With progression, you leave knowing what changed in your eye.
Who should book Zagreb Photo Safari (and who might want a different pace)
This tour fits best if you want:
- A structured photo walk through Zagreb’s key areas in a limited time window.
- Practical coaching for phone photography or camera use.
- A route that mixes parks, markets, street scenes, and medieval landmarks.
- A guide who can explain what you’re seeing and how to translate it into photos.
It’s also a good match for couples, friends, and solo travelers who like planning without turning the day into a checklist sprint.
If you’re the type who needs a long sit-down to shoot slowly, this may feel too stop-and-go. Still, you can make it work by focusing on one best photo per stop and letting the guide’s light-timed schedule do the heavy lifting.
Should you book this Zagreb Photo Safari? My practical take
If you want more than sightseeing photos, I think it’s a smart choice. At $117 for about 2 to 4 hours, you’re paying for guided composition coaching, phone-aware teaching, and a route that’s built around getting to places when the light helps you.
The biggest strength is that it caters to different skill levels without turning the tour into a lecture. The strongest signals from the feedback are the guide’s patience, instruction quality, and his ability to make practical changes you can use immediately—whether you’re shooting a phone like an iPhone 14 or using a camera.
Book it if you want your time in Zagreb to turn into stronger photos with less guesswork. Pass or consider a different style tour if you hate being on a schedule or you want to spend long stretches capturing many near-identical shots.
FAQ
How long is the Zagreb Photo Safari?
The tour lasts about 2 to 4 hours.
What is the price of the tour?
The price is $117.
Is the ticket digital?
Yes, the tour uses a mobile ticket.
What does the tour include?
It includes a professional photographer-guide, a beverage break, a phone photography upgrade, tracking your photography skills, and a 360-degree cityscape covered ticket for the Kula Lotrščak viewpoint.
What is not included?
The tour does not include photography cameras or photography equipment, and it does not include alcoholic beverages.
Where do I meet the guide?
The meeting point is Trg Kralja Tomislava 12, Zagreb.
Is this a private tour?
Yes. It’s private, meaning only your group participates.
What kind of photographers is this for?
The tour is designed for beginners through experienced photographers, with different emphasis depending on your experience.
Can I cancel for free?
Yes. You can cancel up to 24 hours in advance for a full refund.
More Tour Reviews in Zagreb
Not quite it? More Zagreb tours and day trips
- Jump into Zagreb: Walking Tour with local guide
★ 4.8 · 3 reviews - Zagreb : Highlights Walking Tour With A Guide
★ 4.7 · 3 reviews - Zagreb Food Tour: Bite into Traditional Dishes and Flavors
★ 5.0 · 3 reviews - Zagreb to Split private transfer with National park Plitvice lakes guided tour
★ 5.0 · 3 reviews - Plitvice Lakes and Rastoke Private Day Tour from Zagreb
★ 5.0 · 3 reviews - Plitvice Lakes Private Guided Tour from Zagreb with Transfer to Split
★ 5.0 · 3 reviews - Private transfer from Zagreb to Zadar with Plitvice Lakes private tour
★ 5.0 · 3 reviews - Plitvice Lakes Hidden Gems from Zagreb
★ 5.0 · 3 reviews